> ## Documentation Index
> Fetch the complete documentation index at: https://moengage-docs-limits-personalize.mintlify.site/llms.txt
> Use this file to discover all available pages before exploring further.
# How to Recommend Apparels by Size and Availability
# Introduction
Many times, marketers recommend products that are out of stock or do not exist in the size requested. This creates a bad user experience, and the user might be skeptical while clicking the engagement communications.
A marketer needs to manage the recommendations regarding stock and size availability to create a better user experience.
In this article, we will create an AI recommendation to recommend clothes and shoes of the size the user has previously purchased and are currently in stock.
# Expected Result
Recommendations with correct stock and size availability would give users a better experience when they download the app and browse through the collections available there.
* Events to track the action of a user searching for products, adding a product to the cart or adding a product to the wishlist, completing the purchase, and each action’s related information such as the platform, product name, category, brand, and price. To understand how to track events, refer to the [Developer Guide](/developer-guide/introduction).
* Mapping of these tracked events to concerned MoEngage events. For information on mapping custom events to MoEngage events, refer to [Map User Actions Settings](/user-guide/content/recommendations/prerequisites/map-user-actions-settings).
* Settings for one or more channels such as Push, Email, SMS, or WhatsApp.
# Create a Product Catalog
In this section, let us create a catalog with the following heading and content. Note that we have considered the category name to be the primary key. Thus, the category name has to be unique.
 # Create a Recommendation
In this section, let us create a recommendation based on the user's actions.
1. Navigate to the MoEngage Dashboard and select **Content** > **Recommendations** from the left navigation. The Recommendations page is displayed. For more information, refer to [Creating User Action Recommendations](/user-guide/content/recommendations/basic-recommendations/user-actions-model).
2. At the top right corner, click **+ Create recommendation**. This will take you to the first step, "Select recommendation model."
# Create a Recommendation
In this section, let us create a recommendation based on the user's actions.
1. Navigate to the MoEngage Dashboard and select **Content** > **Recommendations** from the left navigation. The Recommendations page is displayed. For more information, refer to [Creating User Action Recommendations](/user-guide/content/recommendations/basic-recommendations/user-actions-model).
2. At the top right corner, click **+ Create recommendation**. This will take you to the first step, "Select recommendation model."
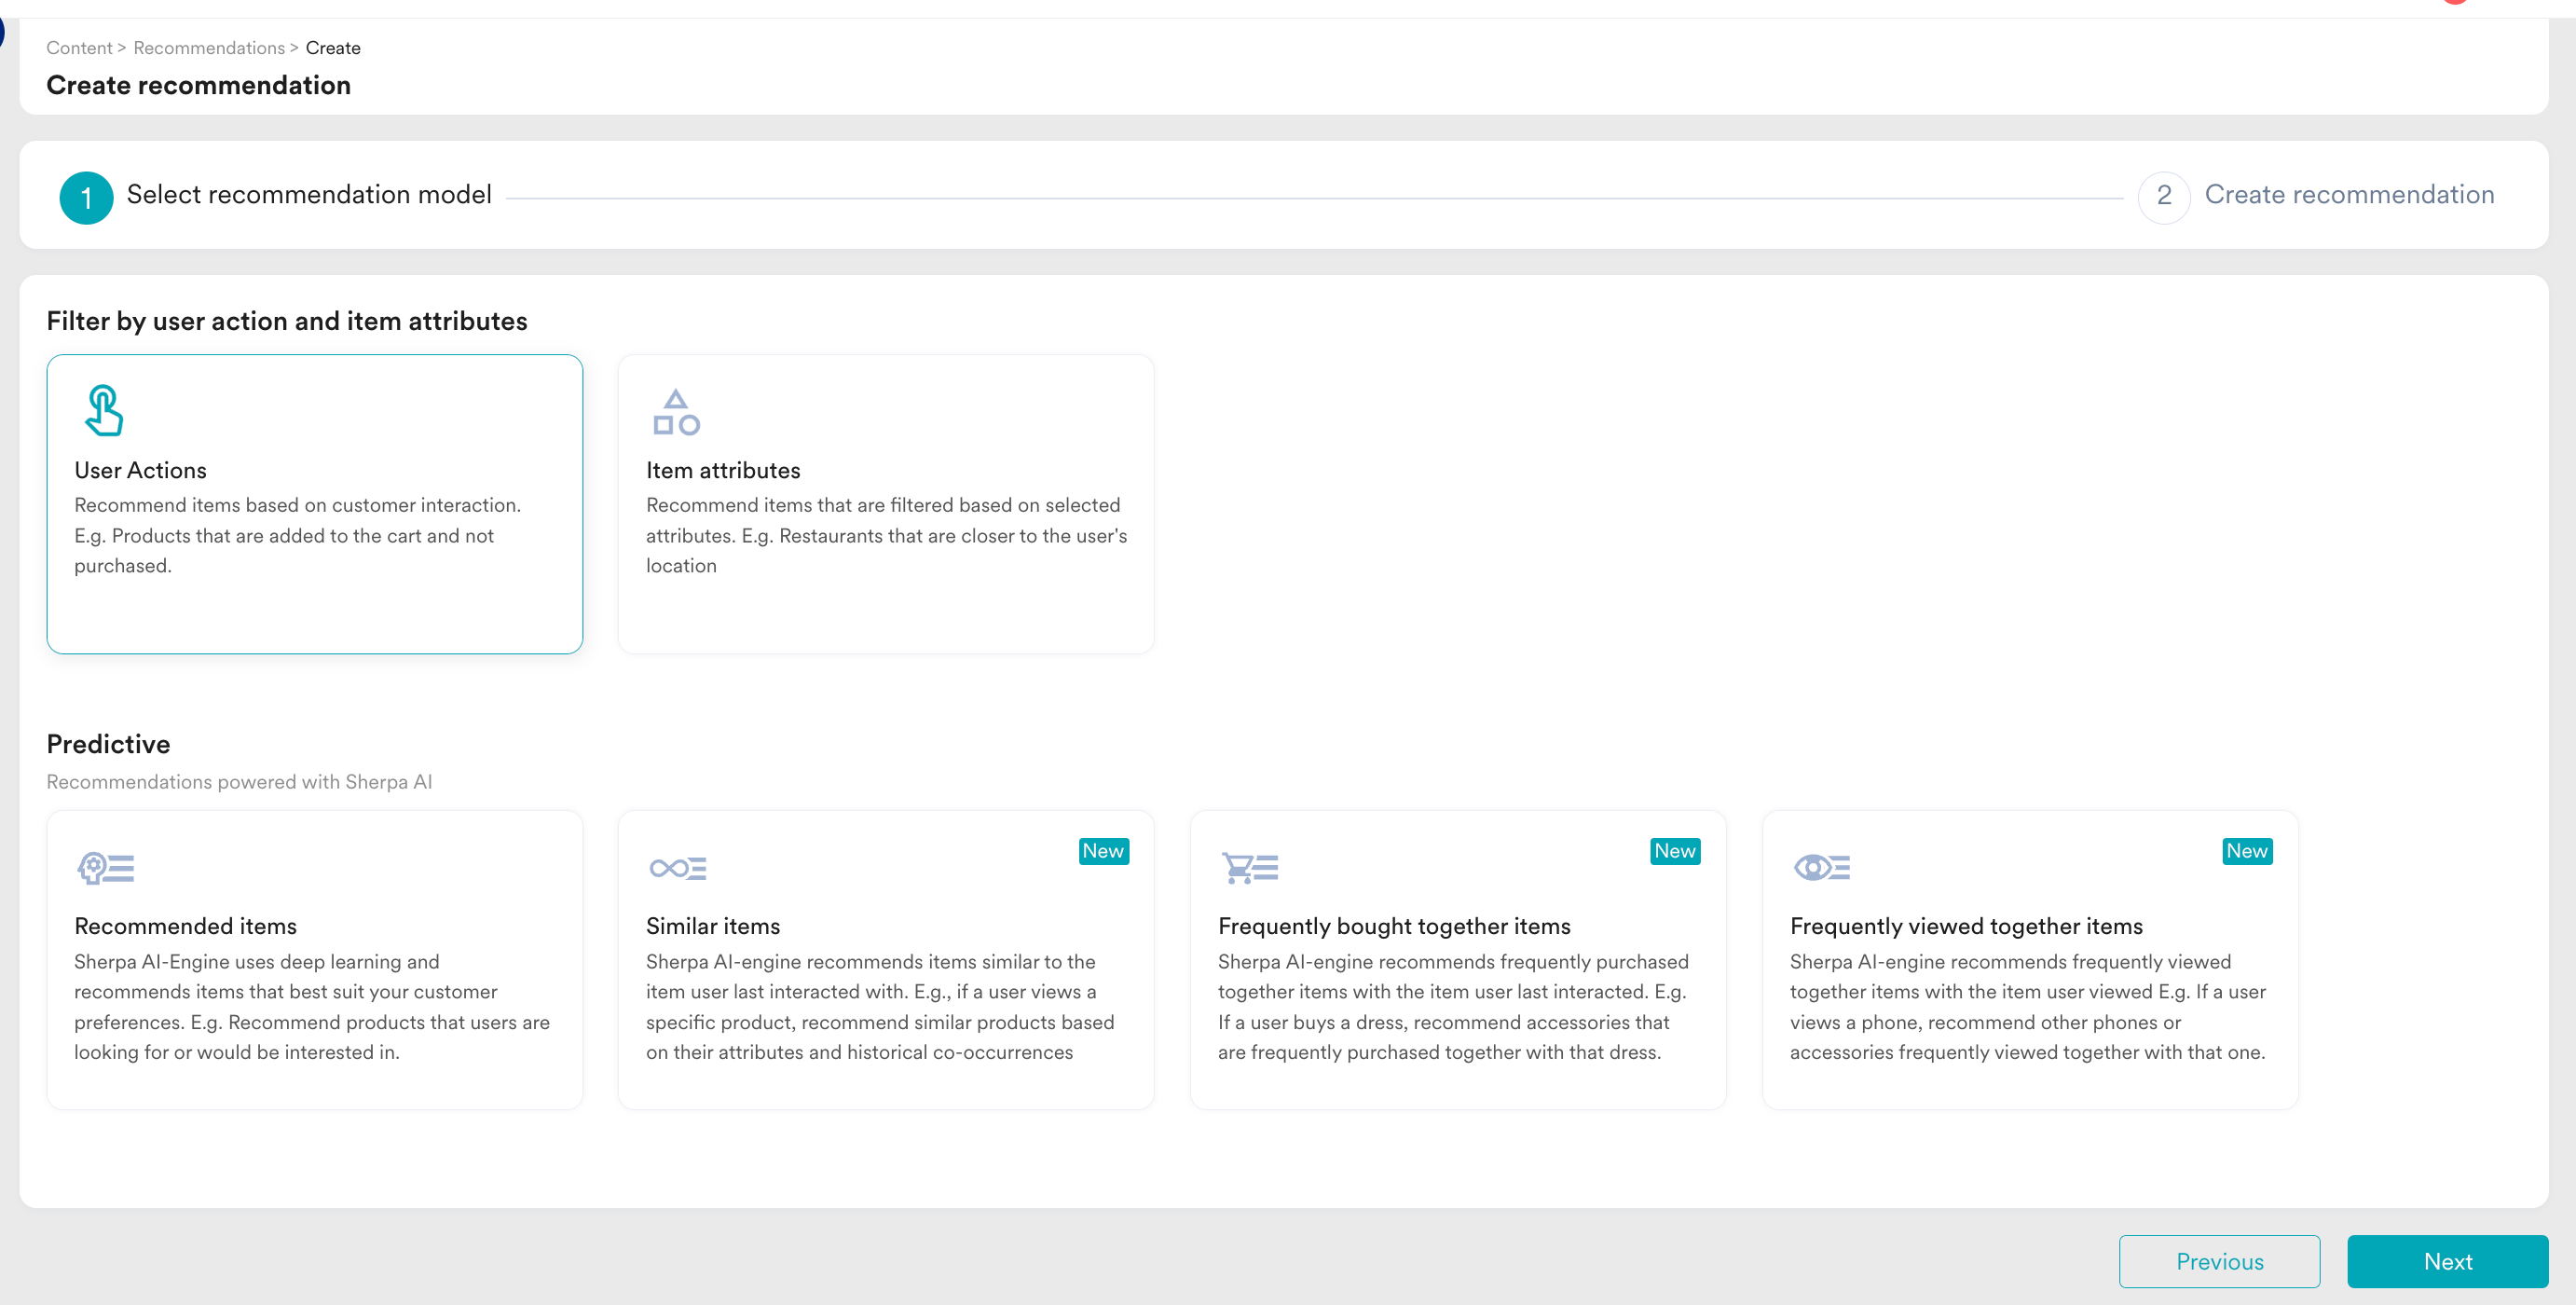 3. Select the **Recommended items** model and click **Next**. It takes you to the second step "Create recommendation". Enter the following details:
1. **Recommendation name**: Enter a name for the recommendation.
2. **Recommendation description**: Enter a description for the recommendation. This description will help you understand the model's aim.
3. **Catalog**: Select the catalog on which the recommendation will be worked.
4. The model should be as follows:
3. Select the **Recommended items** model and click **Next**. It takes you to the second step "Create recommendation". Enter the following details:
1. **Recommendation name**: Enter a name for the recommendation.
2. **Recommendation description**: Enter a description for the recommendation. This description will help you understand the model's aim.
3. **Catalog**: Select the catalog on which the recommendation will be worked.
4. The model should be as follows:
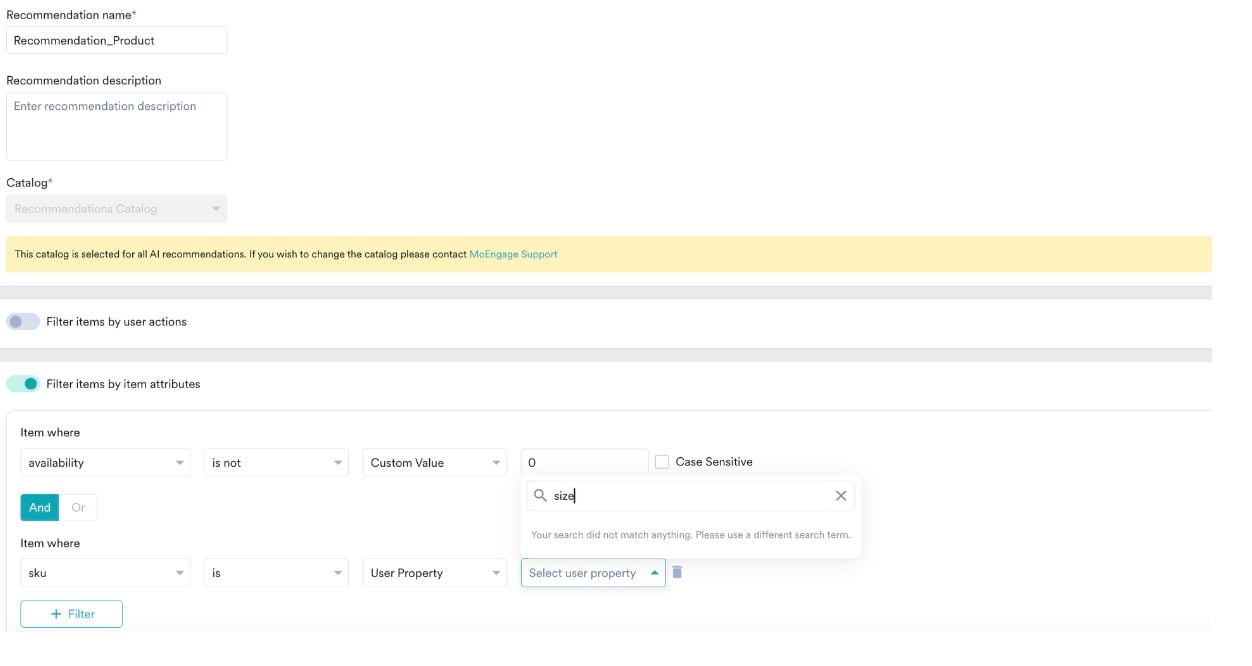 Here, the recommendation model would work based on AI or machine learning (ML) algorithms. After you create recommendations, they will be filtered by availability and size. Generally, availability is numerical. Hence, the options we would get would be *greater than*, *less than*, and so on. So, the availability condition would ideally be greater than 0.\
For size, we will analyze the client’s previous purchase. During the previous purchase, we need to capture the client’s size in a user attribute via SDK or S2S, depending on the client’s tech availability. The S2S method can be achieved using [connectors](/user-guide/campaigns-and-channels/connectors/create/create-a-connector-campaign). The connector campaign can be essentially an event-triggered campaign that would pass on the size from the event attribute to the user attribute via the [User API](/api/user/track-user).\
In either method, a user attribute, **Size**, would be created, which would be used to filter the recommendations.
5. Click **Create** to save the changes and run the model. Its status will be Active on the Recommendations home page.
Now that we have created the recommendation, let us create a Push campaign and personalize it using Recommendations.
# Create a Push Campaign
In this section, let us create a campaign.
## Step 1: Target Users
1. Navigate to the sidebar on the left and click **Engage** > **Campaigns** and click **+ Create campaign** or click **+ Create new** > **Campaign**.
2. Under **Outbound**, select **Push** > **Periodic**.
Here, the recommendation model would work based on AI or machine learning (ML) algorithms. After you create recommendations, they will be filtered by availability and size. Generally, availability is numerical. Hence, the options we would get would be *greater than*, *less than*, and so on. So, the availability condition would ideally be greater than 0.\
For size, we will analyze the client’s previous purchase. During the previous purchase, we need to capture the client’s size in a user attribute via SDK or S2S, depending on the client’s tech availability. The S2S method can be achieved using [connectors](/user-guide/campaigns-and-channels/connectors/create/create-a-connector-campaign). The connector campaign can be essentially an event-triggered campaign that would pass on the size from the event attribute to the user attribute via the [User API](/api/user/track-user).\
In either method, a user attribute, **Size**, would be created, which would be used to filter the recommendations.
5. Click **Create** to save the changes and run the model. Its status will be Active on the Recommendations home page.
Now that we have created the recommendation, let us create a Push campaign and personalize it using Recommendations.
# Create a Push Campaign
In this section, let us create a campaign.
## Step 1: Target Users
1. Navigate to the sidebar on the left and click **Engage** > **Campaigns** and click **+ Create campaign** or click **+ Create new** > **Campaign**.
2. Under **Outbound**, select **Push** > **Periodic**.
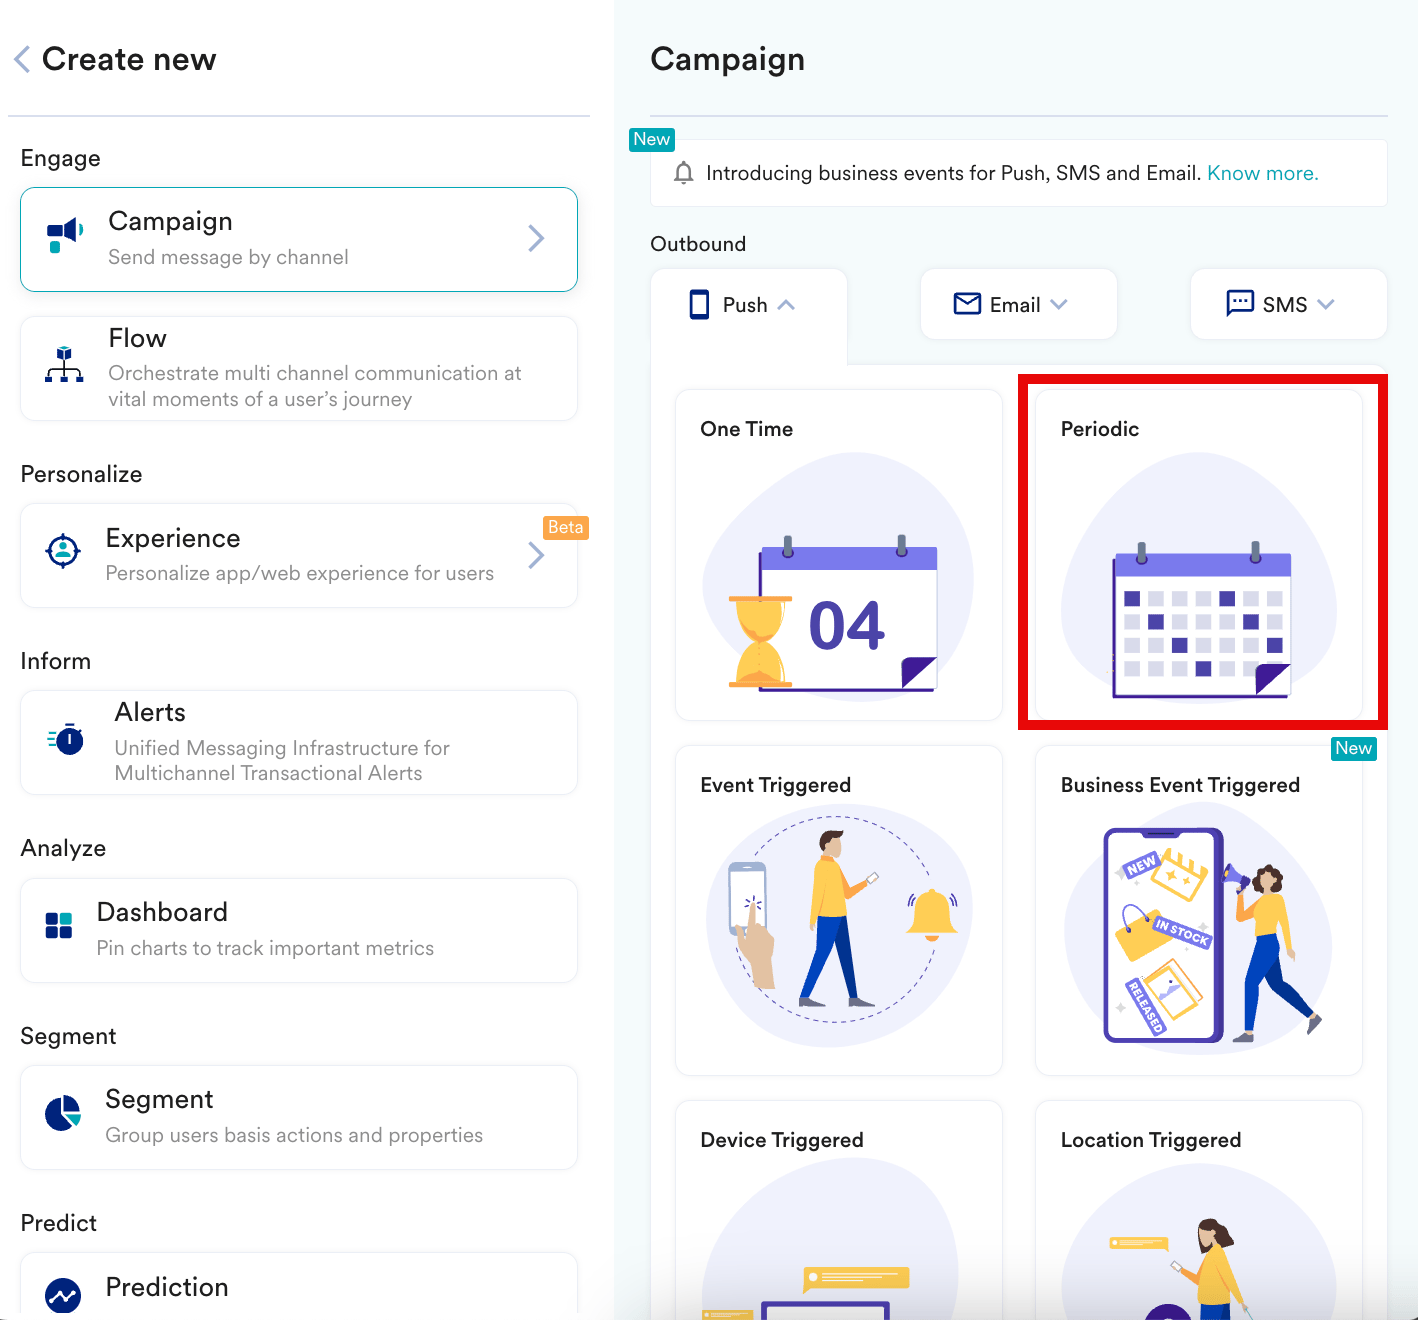 You are taken to the first step, "Target users," of defining your campaign.
3. Enter the following details:
* **Team**: Select a team if your organization has teams enabled for your account.
* **Campaign name**: Enter a name for the campaign.
* **Campaign tags**: Select the required campaign tags.
4. In the **Target Audience** section, select **All users**.
You are taken to the first step, "Target users," of defining your campaign.
3. Enter the following details:
* **Team**: Select a team if your organization has teams enabled for your account.
* **Campaign name**: Enter a name for the campaign.
* **Campaign tags**: Select the required campaign tags.
4. In the **Target Audience** section, select **All users**.
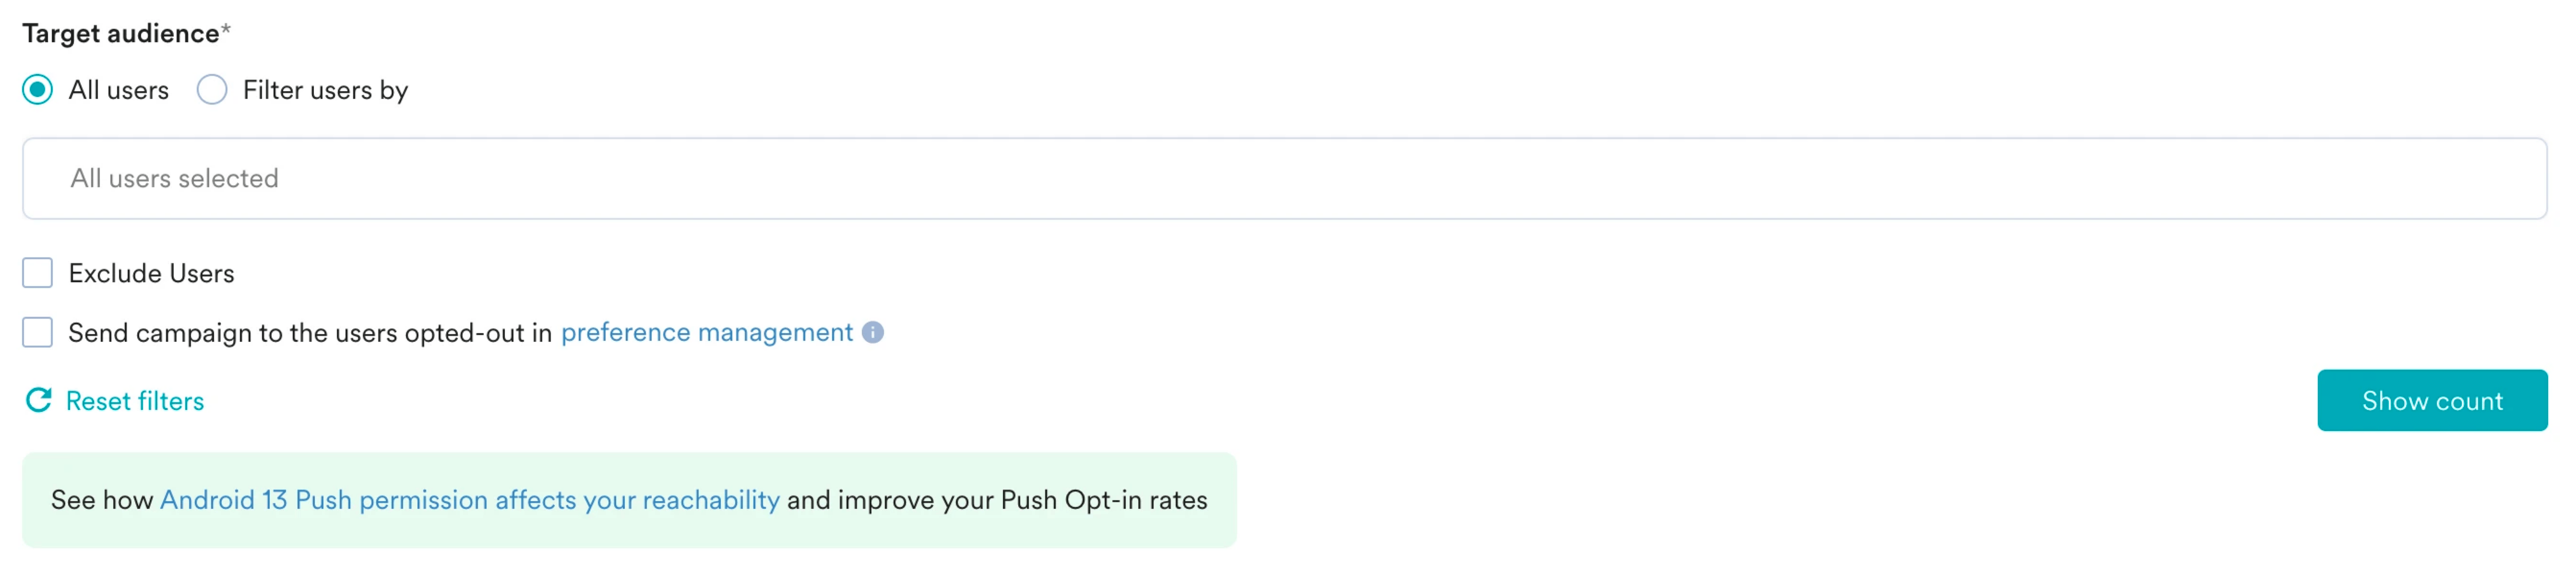 5. In the **Target Platforms** section, select **Android**.
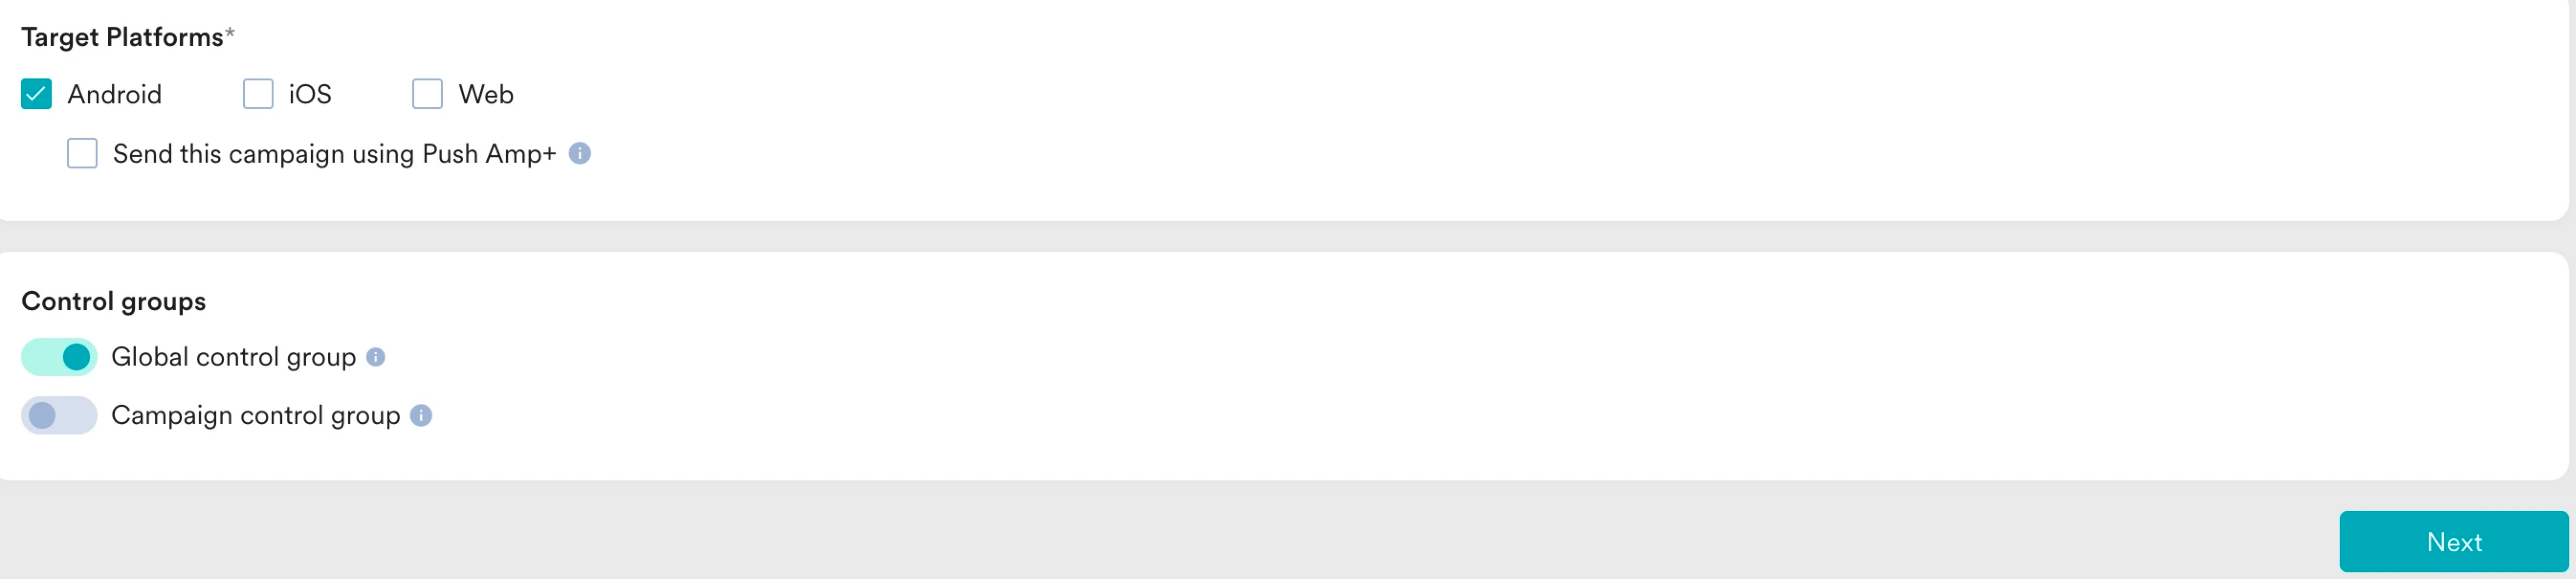 6. Click **Next** to move to the second step, "Content," where you can define the content for your Push campaign.
## Step 2: Content
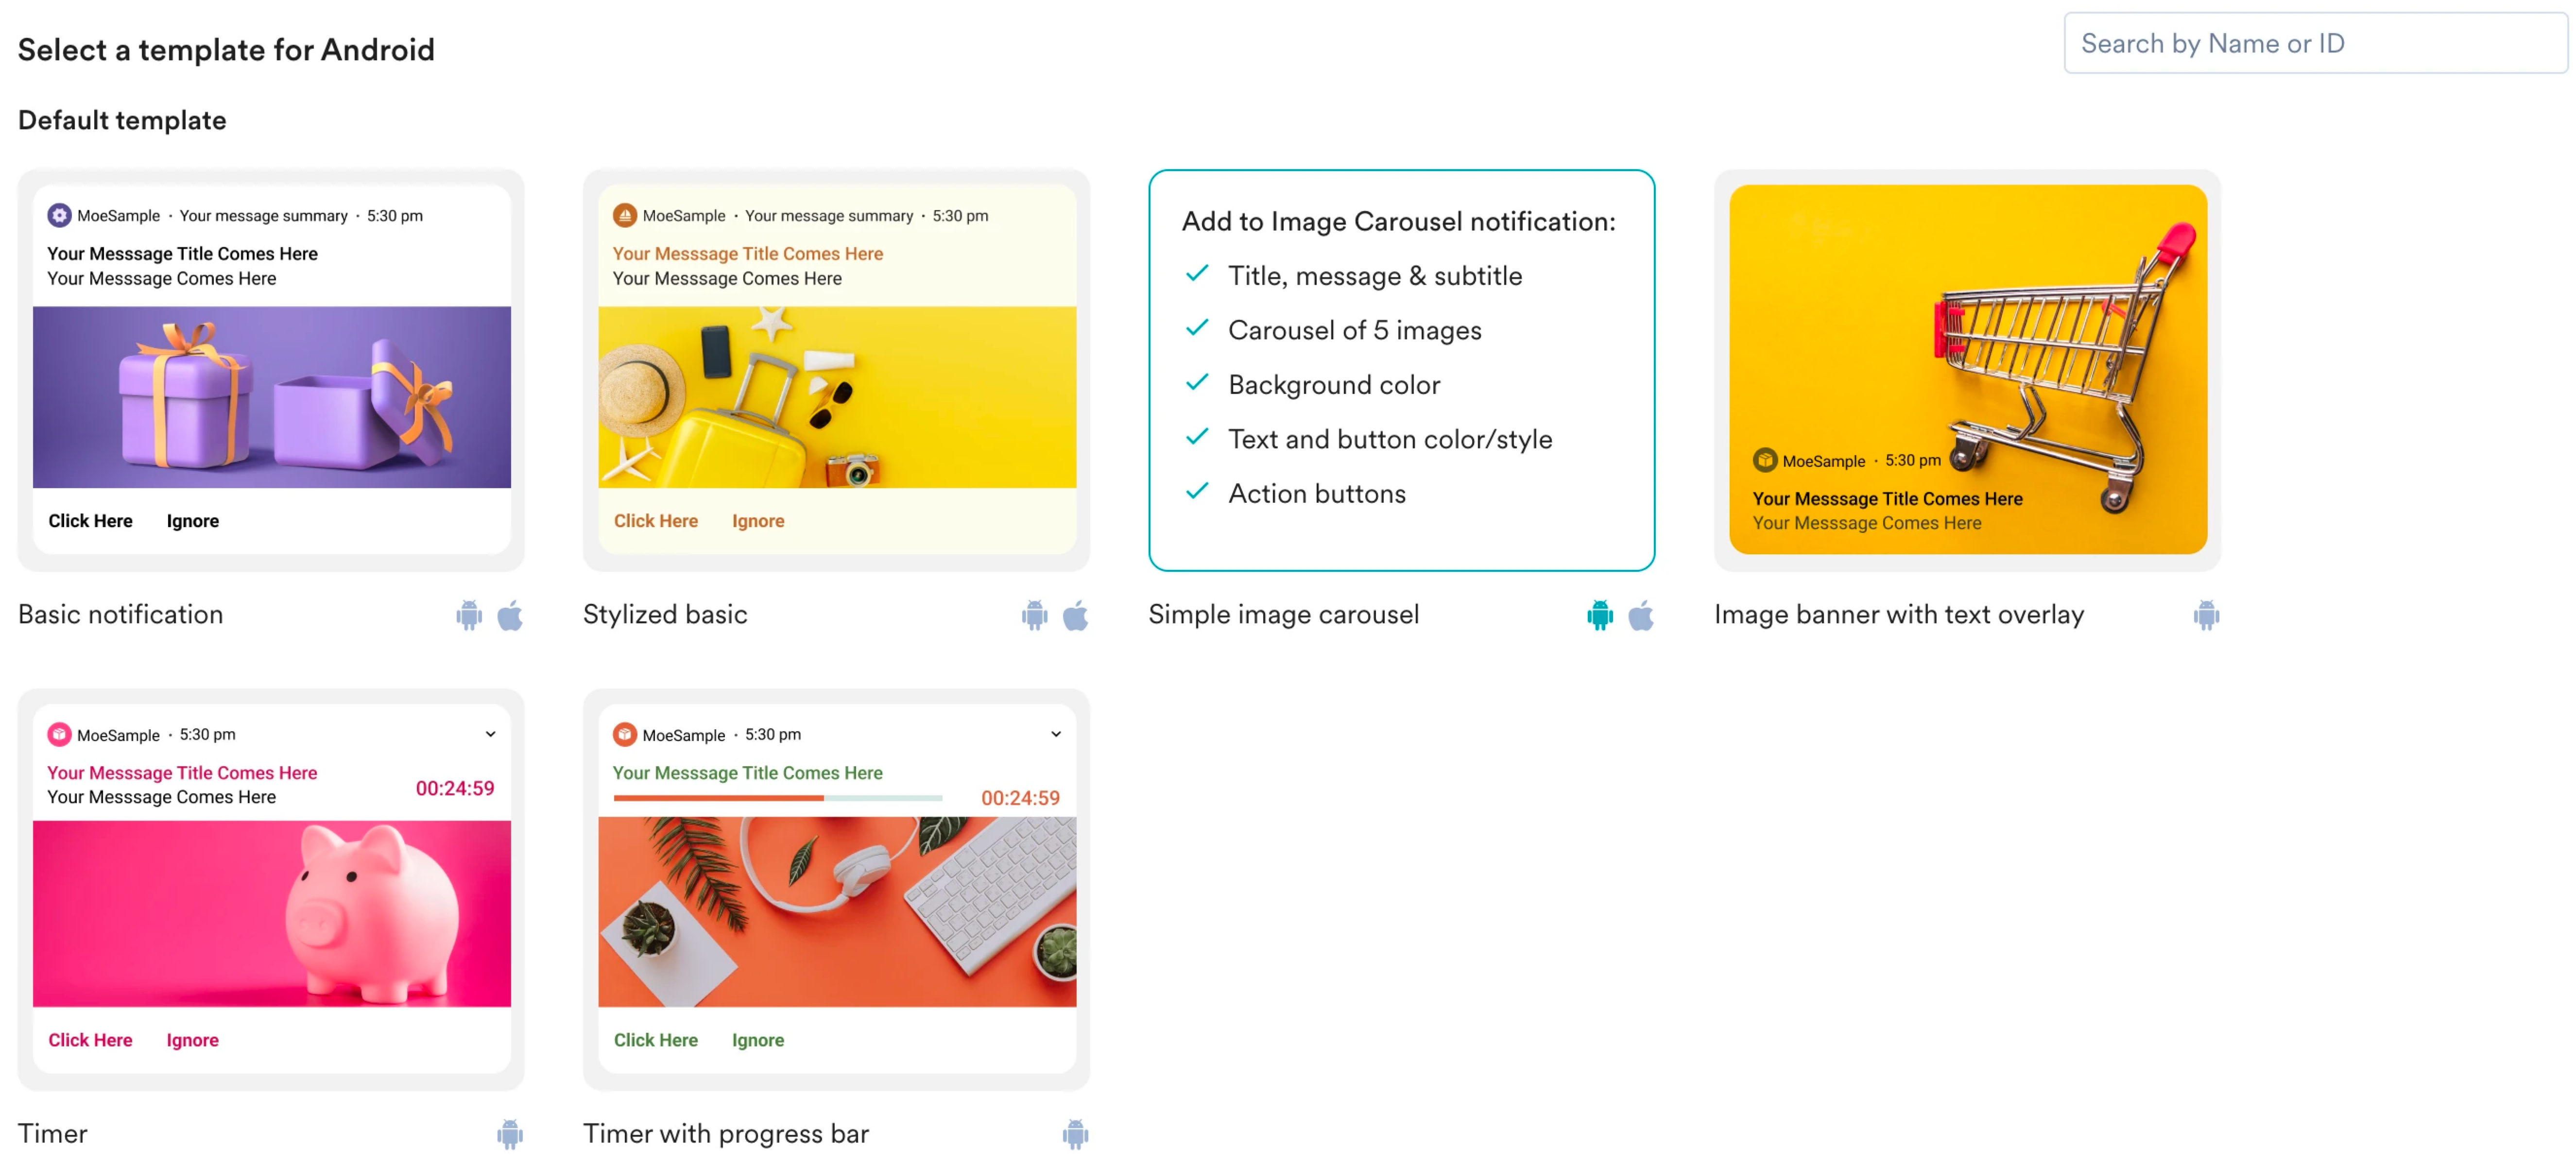
1. Select the template that you would like to use. For our example, select **Basic notification**.
6. Click **Next** to move to the second step, "Content," where you can define the content for your Push campaign.
## Step 2: Content
1. Select the template that you would like to use. For our example, select **Basic notification**.
 2. In the **Message title** field, enter a title.
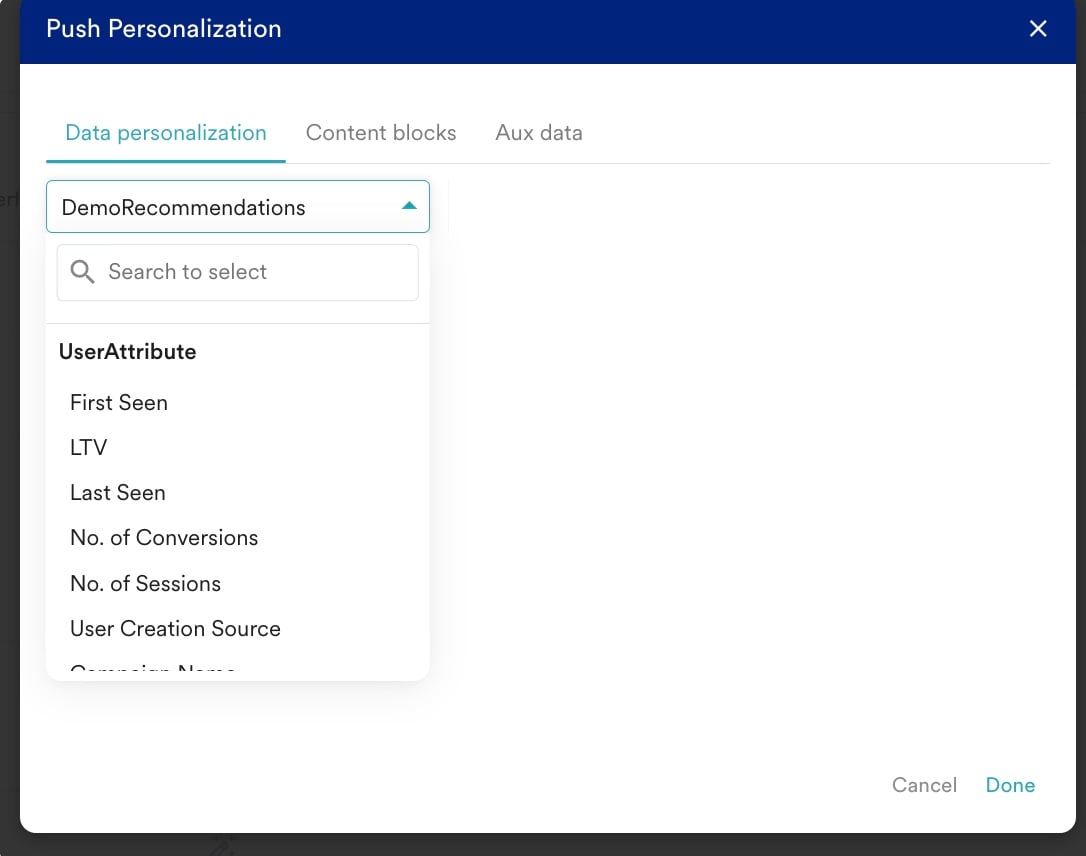
3. While defining the message, select the product set generated through the recommendation [you defined](/use-cases/recommendations/how-to-recommend-apparels-by-size-and-availability#create-a-recommendation). Enter “@” and search for the name of the recommendation that you built, in the Push Personalization pop-up.
2. In the **Message title** field, enter a title.
3. While defining the message, select the product set generated through the recommendation [you defined](/use-cases/recommendations/how-to-recommend-apparels-by-size-and-availability#create-a-recommendation). Enter “@” and search for the name of the recommendation that you built, in the Push Personalization pop-up.
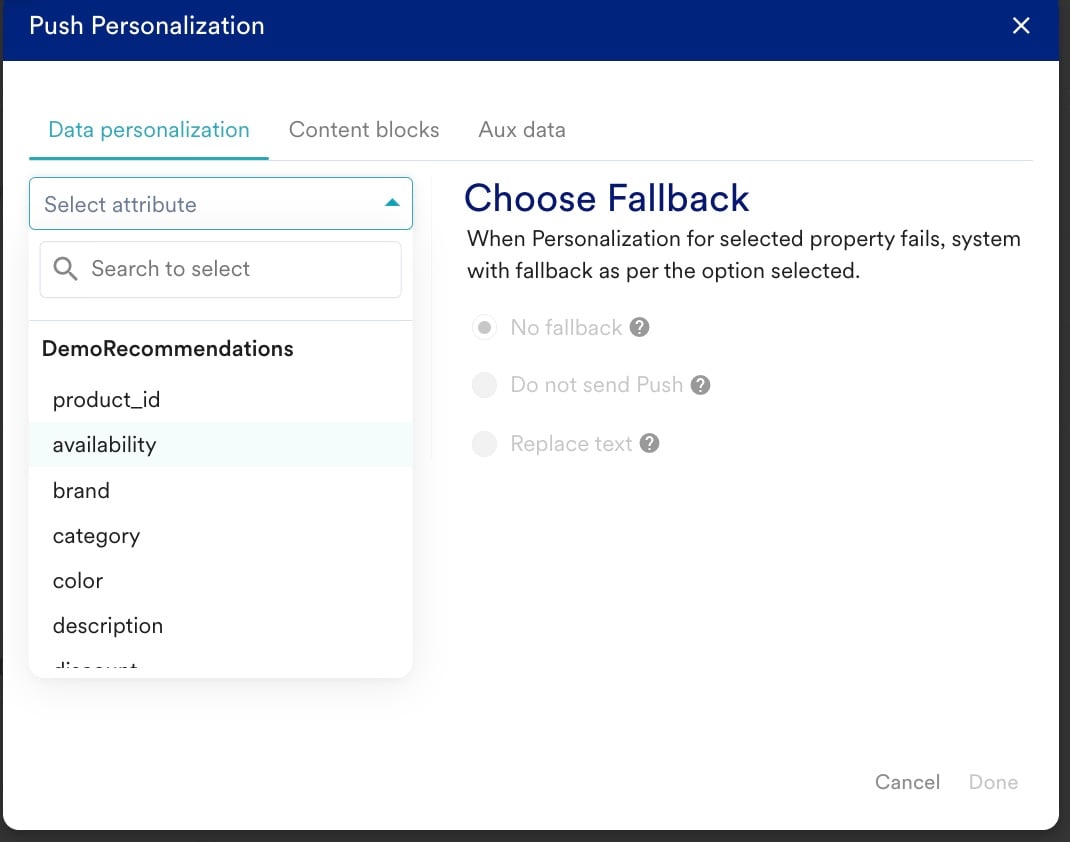 Using recommendations, you can personalize the campaign—title, body, and landing page. For example, if the client wants three different communications, you can have three different communications with three different recommendations in each.
You can also put this in an Email in the same order.
Using recommendations, you can personalize the campaign—title, body, and landing page. For example, if the client wants three different communications, you can have three different communications with three different recommendations in each.
You can also put this in an Email in the same order.
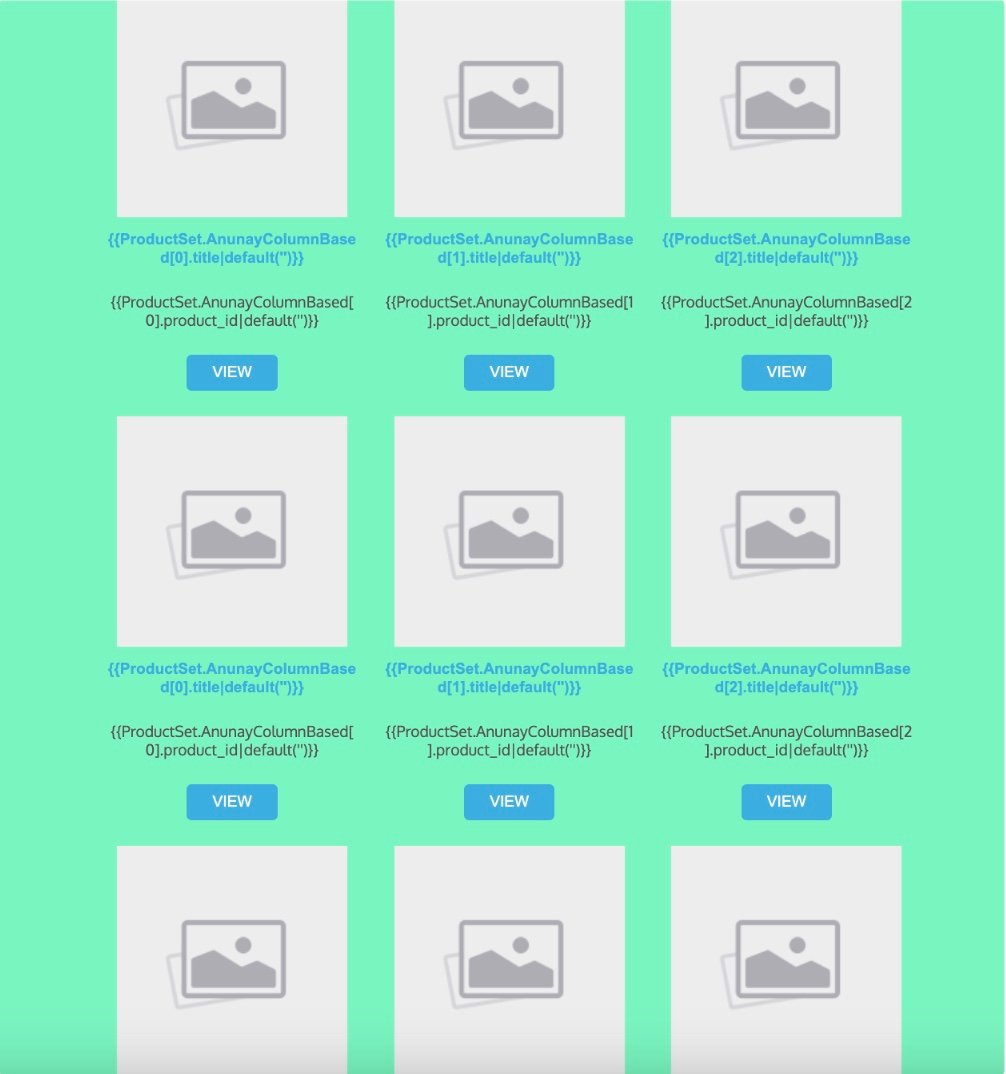 Row 1 is Recommendations for Choice 1; Row 2 is Recommendations for Choice 2; and Row 3 is Recommendations for Choice 3. These recommendations will be filtered based on availability and size.
4. Click **Next** to move to the third step, "Schedule and goals," where you can define your campaign's schedule and goals.
## Step 3: Schedule and Goals
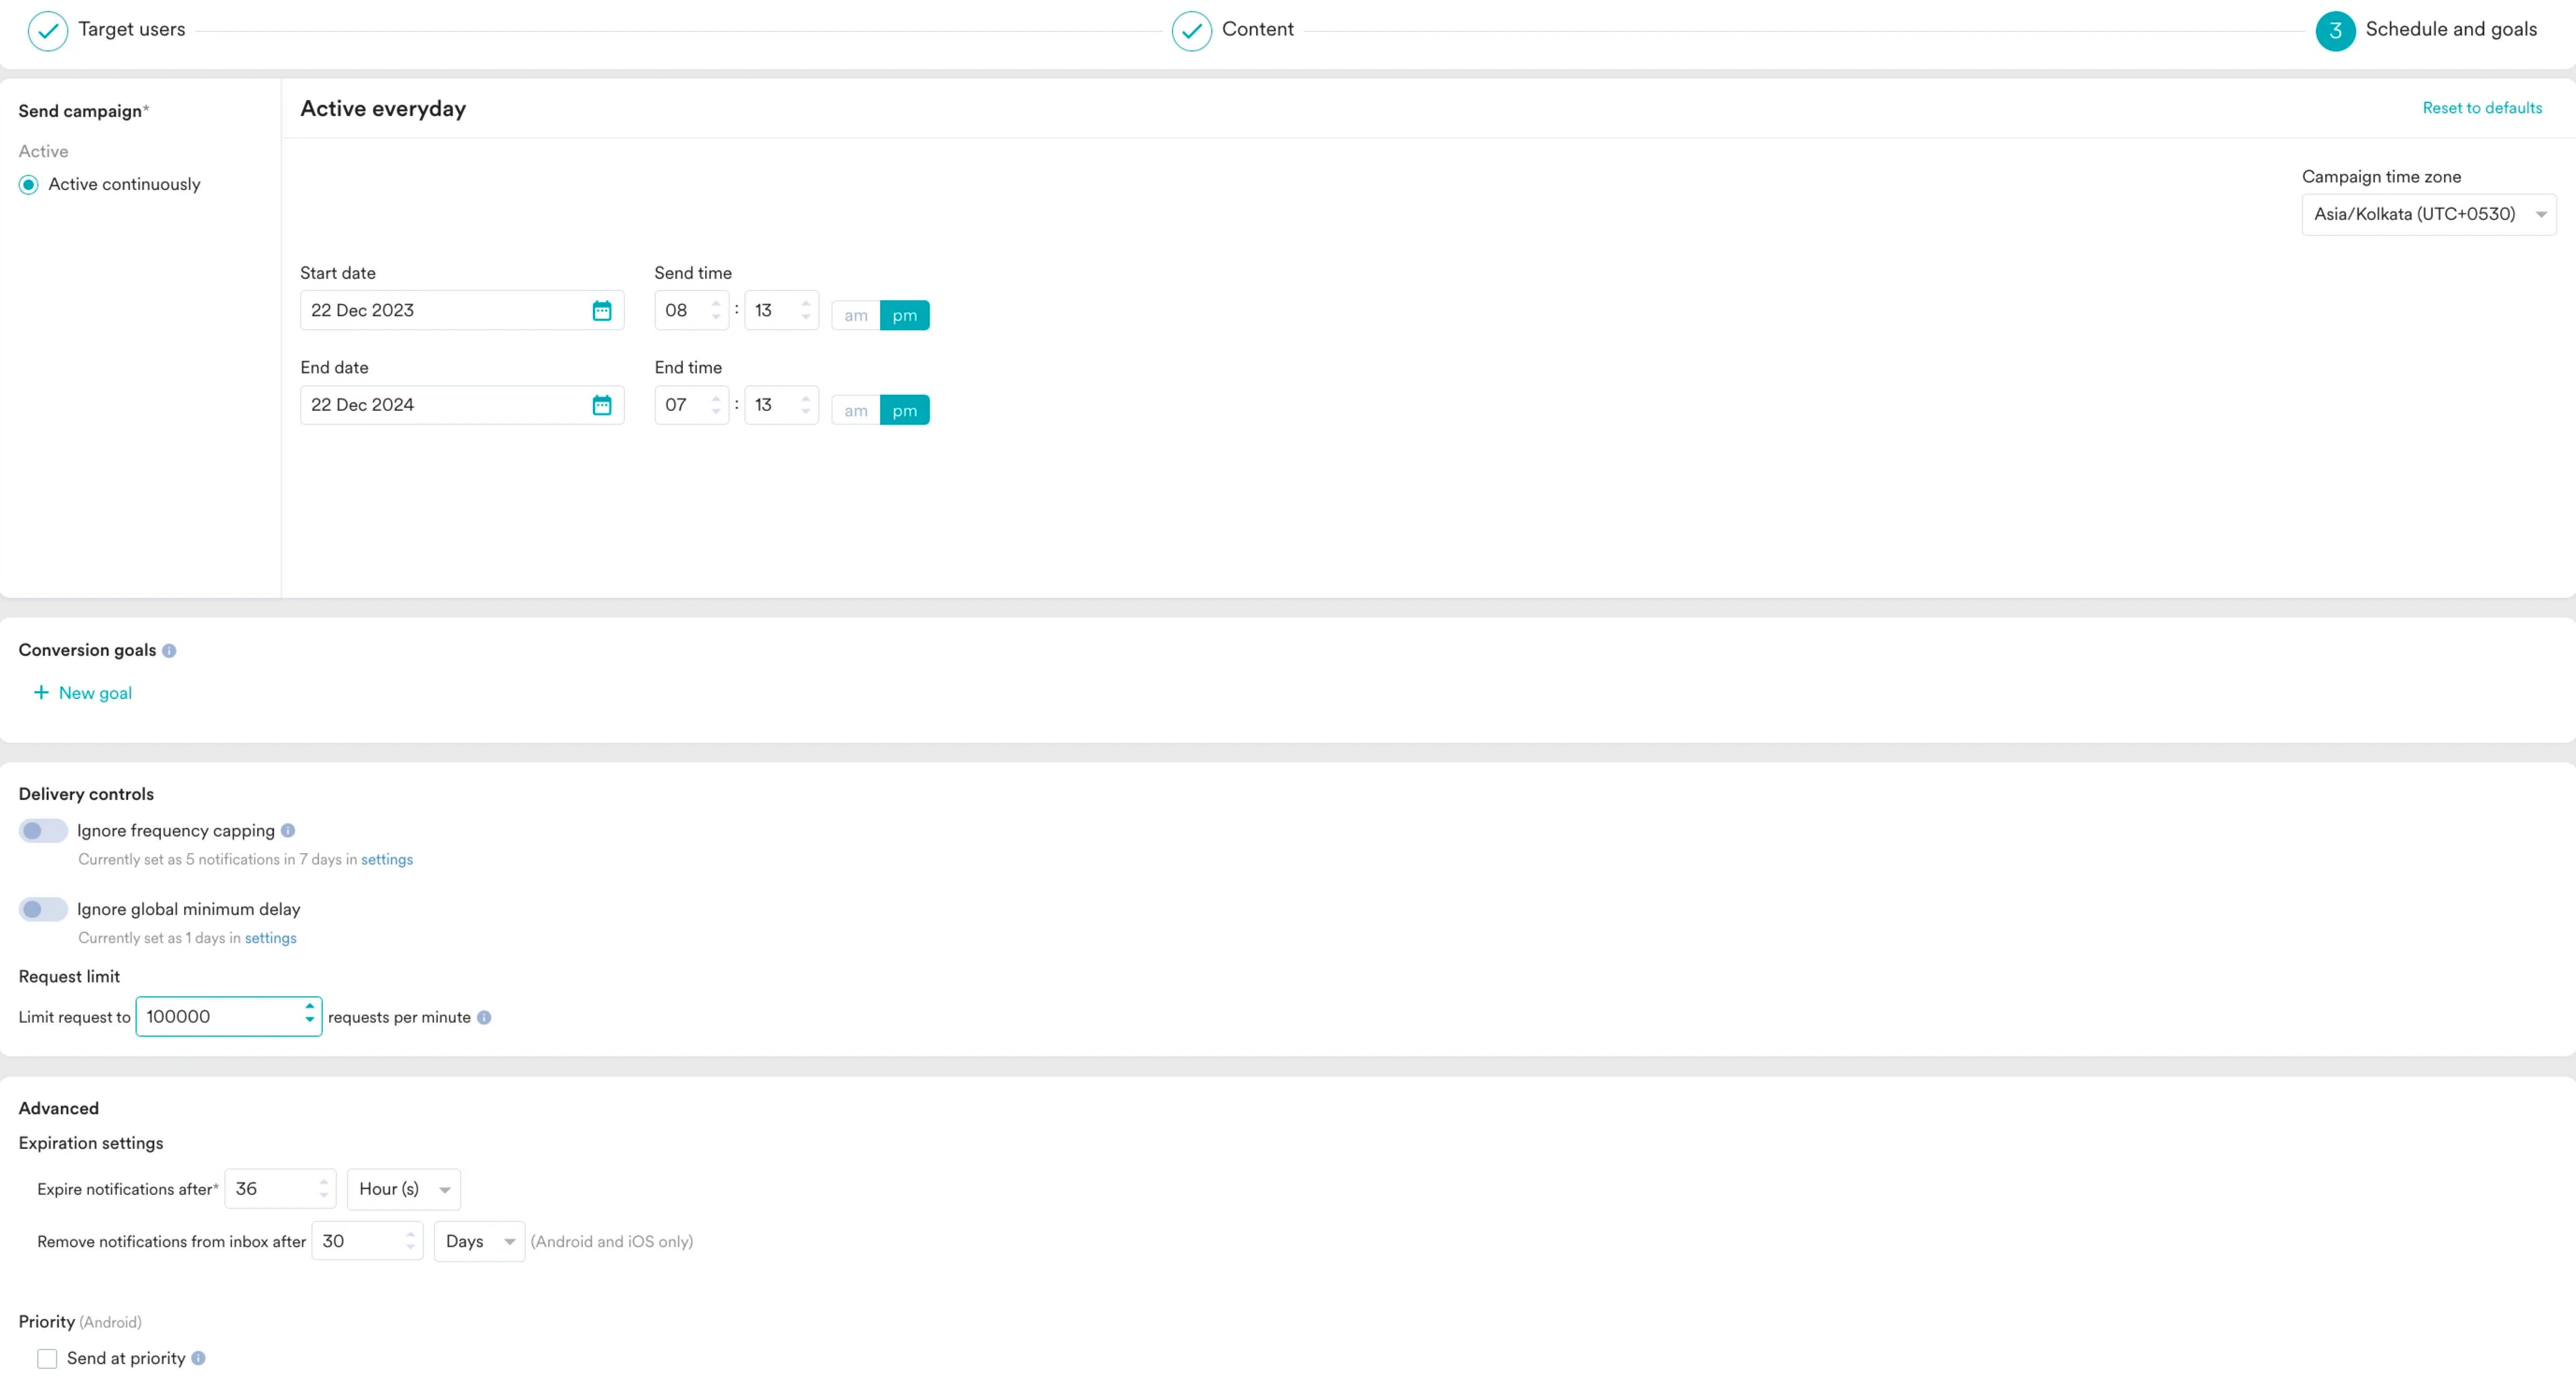
1. In the **Send campaign** section, select when the campaign should be delivered to your users and the periodicity of delivery.
2. Change the deliverability settings based on your requirements. For more information about these settings, refer to [Create Push Campaigns](/user-guide/campaigns-and-channels/mobile-push/create/create-push-campaigns).
Row 1 is Recommendations for Choice 1; Row 2 is Recommendations for Choice 2; and Row 3 is Recommendations for Choice 3. These recommendations will be filtered based on availability and size.
4. Click **Next** to move to the third step, "Schedule and goals," where you can define your campaign's schedule and goals.
## Step 3: Schedule and Goals
1. In the **Send campaign** section, select when the campaign should be delivered to your users and the periodicity of delivery.
2. Change the deliverability settings based on your requirements. For more information about these settings, refer to [Create Push Campaigns](/user-guide/campaigns-and-channels/mobile-push/create/create-push-campaigns).
 3. Click **Publish**.
Once the user clicks on the communication, they will be redirected to the browsing page to explore more products. More browsing can lead to an increased percentage of purchases.
# Conclusion
In this article, we created an AI recommendation to recommend clothes and shoes of the size the user has previously purchased and are currently in stock.
Recommendations are key to increasing and improving the app's usage. These outbound recommendations not only nudge the users, but sending them at the right time also entices them to try more recommendations/products.
3. Click **Publish**.
Once the user clicks on the communication, they will be redirected to the browsing page to explore more products. More browsing can lead to an increased percentage of purchases.
# Conclusion
In this article, we created an AI recommendation to recommend clothes and shoes of the size the user has previously purchased and are currently in stock.
Recommendations are key to increasing and improving the app's usage. These outbound recommendations not only nudge the users, but sending them at the right time also entices them to try more recommendations/products.